Aerial Rigging 101
Discover what aerial rigging is and why it matters
Why Does Aerial Rigging Matter?
Let’s face it… nothing kills the joy of floating midair like worrying whether the ceiling might give out.
And that’s exactly why aerial rigging matters.
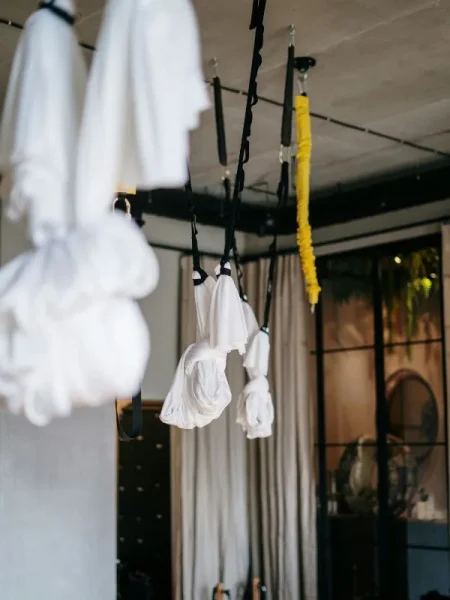
Whether you’re hanging silks, a hammock or a lyra (aerial hoop), rigging is what makes the magic possible – and safe. It’s the unglamorous, behind-the-scenes stuff that deserves way more credit than it gets. Because without it, no one’s flying – at least, not for long.
If you’re brand new to aerial rigging, don’t worry. You don’t need to be an engineer or own a toolbelt. But you do need to understand the basics. Let’s get you grounded before you take off.
What Exactly is Aerial Rigging?
Rigging, in the aerial world, is a fancy way to explain how we secure equipment (like fabric or hoops) to a ceiling, beam, frame or structure. If secured properly, you can hang, swing, invert or flow to your heart’s content… without a crash landing.
It’s part physics, part trust exercise.
When done right, rigging is invisible – you don’t even think about it. When done wrong, well… let’s not go there.
Safety Isn’t Optional
Here’s the unfiltered truth: aerial arts aren’t dangerous because of the movement – they’re dangerous when rigging gets sloppy.
You can have perfect form, flawless wraps and years of experience – but if you’re hanging off a curtain rod or a cheap Amazon hook, none of that will matter.
Aerial rigging is load bearing. That means your entire body weight (and then some) will be on this setup, often with a dynamic force like bouncing, swinging or dropping.
So yes, the equipment has to be safety rated. Yes, the ceiling matters. And yes, this stuff deserves your full attention.
A Few Must-Know Terms
Rig Point: Where your apparatus attaches (anchor spot)
Spanset: A loop of webbing that wraps around beams (versatile and strong)
Swivel: Rotating hardware that prevents fabric or hoop from twisting
Carabiner: Metal clip; get locking ones, always rated
Shear vs. Tension: Direction of force – shear pulls sideways (bad for bolts), tension pulls straight down (safer)
You don’t have to memorize these. Just recognize them, so when someone says something like “always load carabiners along the spine” you’re not picturing vertebrae.

The Anatomy of a Basic Aerial Rig
Whether the aerial rig is in a pro studio or your garage, aerial setups usually include these core components:
1. Anchor Point
This is the point at which your aerial gear connects to the structure – usually a ceiling beam, steel truss or rig frame.
2. Hardware
This includes:
– Ceiling mounts or eye bolts (must be rated and properly installed)
– Carabiners (steel or aluminum, locking, rated for climbing or aerial)
– Swivels (for rotation—optional but magical)
– Daisy chains or spansets (to adjust height and spread out pressure)
3. Your Aerial Apparatus of Choice
Silks, hammock, lyra, trapeze – you name it. This is the fun part.
Every link in the chain matters. If one fails, the whole system fails. That’s why rigging often gets described as a “chain of trust.”
Rated for What? Understanding Load Limits
You might have seen labels like “MBS 25kN” or “WLL 2,000 lbs” on aerial gear and thought… huh?
Let me explain:
MBS = Minimum Breaking Strength – how much force it takes to break the gear
WLL = Working Load Limit – how much weight it can safely support in real use
To stay safe, never rig to MBS. Always go by WLL and apply a safety factor (typically 5:1 for dynamic loads). That means if your full rig setup is rated at 1,000 lbs WLL, the actual breaking point is more like 5,000 lbs.
Feels like overkill? Good. That’s the point. Safety can never be underrated.
Ceiling Aerial Rigging vs. Freestanding Aerial Rigs
If you’re working on a home setup or deciding how to train outside a studio, you’ve got two main options:
1. Ceiling Aerial Rigging
This is permanent and sleek – but only safe if:
– You have exposed beams or concrete, not drywall
– The beam has been inspected and can carry dynamic load
– You have certified hardware installed with help from a professional or structural engineer
It is great for minimalists. Terrible for renters.
2. Freestanding Aerial Rigs
Think portable swing sets for grown-ups. They are adjustable, mobile and don’t require ceiling anchors.
There are great brands on the market like:
– Uplift Active
– X-Pole A-Frame
– Lupit Aerial Stand
You’ll need flat, open space – and be prepared for some setup time. But freestanding aerial rigs are awesome for hammocks, low aerial silks, and lyra practice.
An added bonus: no holes in your ceiling.
Plus: Let’s Talk About Your Floor
It sounds backwards, but your floor setup is part of aerial rigging too.
Whether you choose a ceiling aerial rig or go with the freestanding aerial rig, you’ll need:
– Crash mats or puzzle mats for safety
– Clearance space – you don’t want to spin into a lamp or coffee table
– Head clearance if inverting or swinging (especially with hammocks or lyra)
– Rule of thumb: At least 6 feet of clearance in every direction and 12 feet ceiling height if possible (lower for hammock, higher for silks or lyra).
Seasonal, Weather and Wear Considerations
Something you do need to consider: rigging reacts to weather.
– Humidity can corrode carabiners (check for rust!)
– Extreme cold or heat affects nylon and metal properties
– Outdoor rigs need regular inspection for UV damage, wind stress, and even critters nesting inside your spansets (yes, that happens)
Make aerial equipment checks part of your routine. Aerialists often say, “Inspect it every time like you’re rigging for someone you love.”
Why? Because you are.
What You Shouldn’t Rig From
Let’s make this easy. If you’re ever thinking, “Maybe this is strong enough…” – it probably isn’t.
Avoid:
– Tree branches (beautiful, but unpredictable)
– Exposed pipes (not meant for load)
– Ceiling fans (please don’t)
– Drywall-only ceilings
– Curtain rods, door frames or beams that haven’t been inspected
Rigging takes real equipment and real knowledge. Guesswork doesn’t belong here.
What If You’re Just Renting Studio Space?
Even if you’re not the one installing anchors, you should know:
– How your rig connects
– What aerial gear you are using (bring your own carabiners if possible)
– Whether the studio requires certain heights or rigging practices
– How to check your fabric and gear before every session
No shame in asking, “What’s the WLL on this beam?” or “Can someone please check my setup?” In aerial, caution is respect – there is no shame in that.
Studio Aerial Rigging vs. Home Aerial Rigging
Besides the obvious (cost, convenience, accountability), studios offer:
– Inspections and equipment logs
– Liability insurance
– Trained instructors spotting you
– Fixed rigs built to support multiple users and apparatus types
Home rigging gives you more freedom – but requires research, ongoing checks and a lot of responsibility.
How do you find a good balance? You could try training at a studio, then practicing basics safely at home with a proper setup. This could be especially helpful if you’re a hammock lover or working on strength drills.
Rigging Equipment Starter List for Beginners
This is not an exhaustive list but will provide a good starting point for beginners:
– Steel locking carabiners (at least 2, climbing-rated)
– Swivel (for lyra or hammock spinning)
– Spansets or daisy chains
– Crash mat
– Measuring tape (for ceiling height, beam width, spacing)
– Notebook or app to track inspections, rig dates, gear origin
And maybe… a reminder somewhere on your wall or on your phone, “Rig it like your life depends on it.” Because honestly, it does.
Should You Rig Your Aerial Equipment by Yourself?
Here’s where things get sticky.
If you’re a first timer, the answer is a resounding no. At least not alone. Find a certified rigger, aerial instructor or builder who understands dynamic load physics, is qualified and can assess your ceiling or structure.
You can learn – but take your time, ask questions and never skip a walkthrough of the full system. Some studios offer rigging workshops or referrals.
When In Doubt, Ask
Rigging isn’t about showing off how much you know – it’s about protecting your body and your peace of mind. If you’re unsure about any part of your setup… Stop. Ask. Learn.
Because being “the careful one” in aerial doesn’t make you less cool.
It makes you someone who gets to keep flying.